
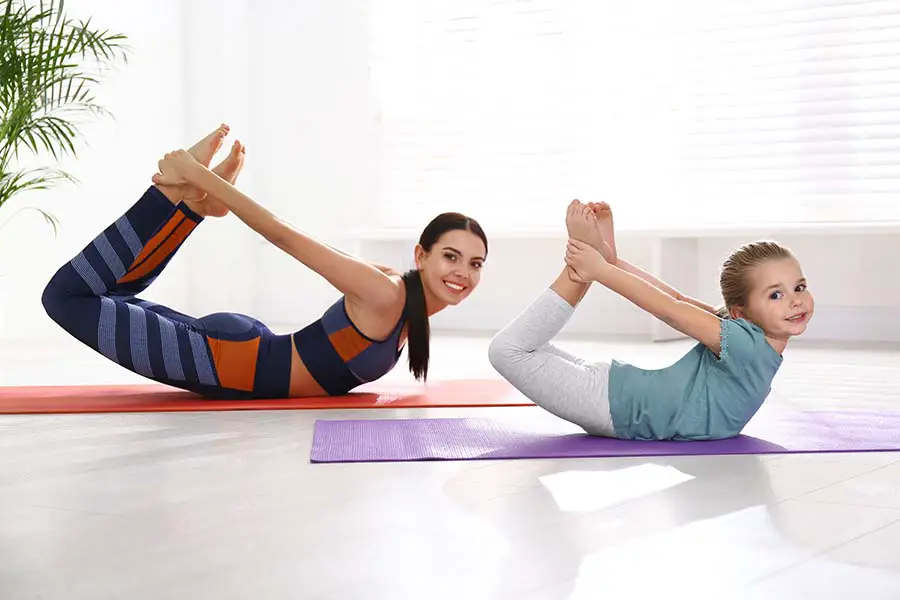
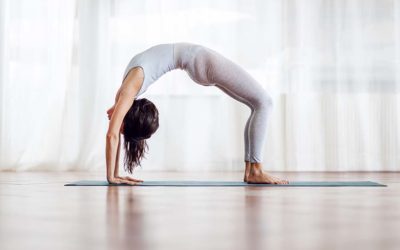
If you’re one of the millions of individuals who spend their days hooked to a desk for long periods, Bow pose yoga is a must-have for you. Dhanurasana, or Bow Practice, is a backbend-like intermediate yoga pose.
It’s one among Hatha Yoga’s 12 fundamental postures. The chest is expanded, and the back is deeply stretched by pulling your body up and backward. After a hard day of hunching over, this position is a terrific method to extend your back profoundly.
Basics of Bow Pose Yoga
This yoga posture can be done as part of your daily routine or a back stretch sequence. Bow position should be done after your body has warmed up from several standing and floor postures.
Grab your yoga mat to get started. A yoga towel or yoga straps might also help you get into the stretch if you’re a newbie.
4 Benefits Of Dhanurasana Bow Pose in Yoga
Bow pose benefits you with several health advantages, including:
Enhance Hip Flexors
Dhanurasana bowing pose stretches the hip flexors, which are generally weak due to lack of usage. Hip unlocking can work wonders for circulation, lower back discomfort, and mobility in the region.
Digestion Is Aided
Dhanurasana engages your stomach and pelvis with the floor, massaging the digestive system’s organs. Holding bow pose can assist with constipation and stomach pain.
Increase The Strength Of Your Upper Back
Bow position strengthens the back and improves posture and mobility by using all of the back muscles as you reach back to grip your ankles.
Enhance Posture
This state releases your shoulders from the front, alleviating tension and eliminating slouching, which can help you improve your posture.
How To Bow Pose: Step-by-step
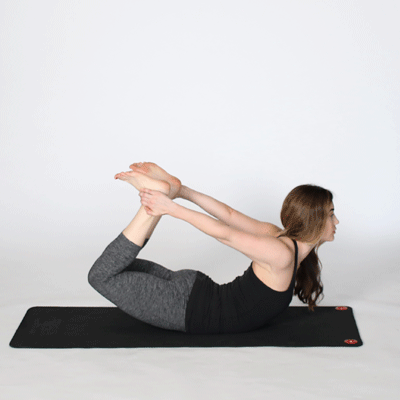
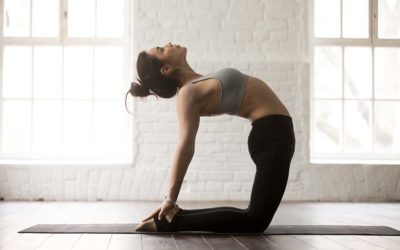
Begin By Lying On Your Stomach
Start the bow posture by lying down on your stomach, arms at your sides, palms facing up. Maintain a hip-width distance between your knees.
Hold Your Ankles Firmly In Place
To elevate your upper body off the floor, raise your head along with clench your shoulder blades. Bring your feet as close to your buttocks as possible by bending your knees and squeezing them together. Holding the outside of your ankles with both hands, reach back.
Raise Your Thighs And Legs
Lift your heels and thighs away from the floor once you’ve gripped your ankles, which should raise your head and upper torso.
Maintain Your Current Position
Push your tailbone into the floor while grabbing your ankles, keep your back muscles relaxed, and maintain the position for 15 to 30 seconds.
Beginners may find it challenging to lift their thighs off the ground. In this case, you can help your legs rise by laying on a rolled-up blanket with your thighs supported.
Common Mistake
To avoid injury and preserve an appropriate form, it’s critical to avoid these mistakes.
Holding The Tops Of Your Feet Is Not A Good Idea
The ankle is the safest area of the foot; however, gripping the feet’ tops might cause sliding. You may lose your balance and strike your chin or chest on the floor if your hands slide.
Knees Should Be Hip-Width
When your knees are too close together, you may have back pain. It can also cause straining by opening the hips inappropriately. Maintaining a hip-width distance between your knees allows your body to align properly and comfortably.
Carefully Rotate The Shoulder Socket
Throughout the exercise, make sure to rotate your shoulder gently and cautiously. Rushing through the reaching and raising of your arms might cause injury or discomfort to your shoulder.
Please Take A Deep Breath, But Don’t Hold It
You don’t have to hold your breath in the floor bow. Make sure you’re inhaling correctly to get the most out of this stance. As you bend into and out of the position, exhale. When you elevate your head, take a deep breath.
Conclusion
Bow pose yoga is a mental, physical, and spiritual activity that may help you improve your well-being. You might be ready to go to more complex positions if you’ve mastered some of the fundamental yoga foundations.
However, this technique is not recommended if you are pregnant, have hypotension or hypertension, or have severe lower back discomfort.

0 Comments