
Yoga is a discipline that looks simple but requires a lot of effort, both mentally and physically. Yoga poses vary from easy to difficult; not everyone healthy can do it for advanced ones.
But for yoga enthusiasts, upgrading themselves by challenging difficult poses is never boring. It is also an extremely effective stress reliever. Let’s jump into the next part to discover 16 crazy yoga poses that you should make a try!
16 Crazy Yoga Poses
#1. Eight Angle (Astavakrasana) Pose
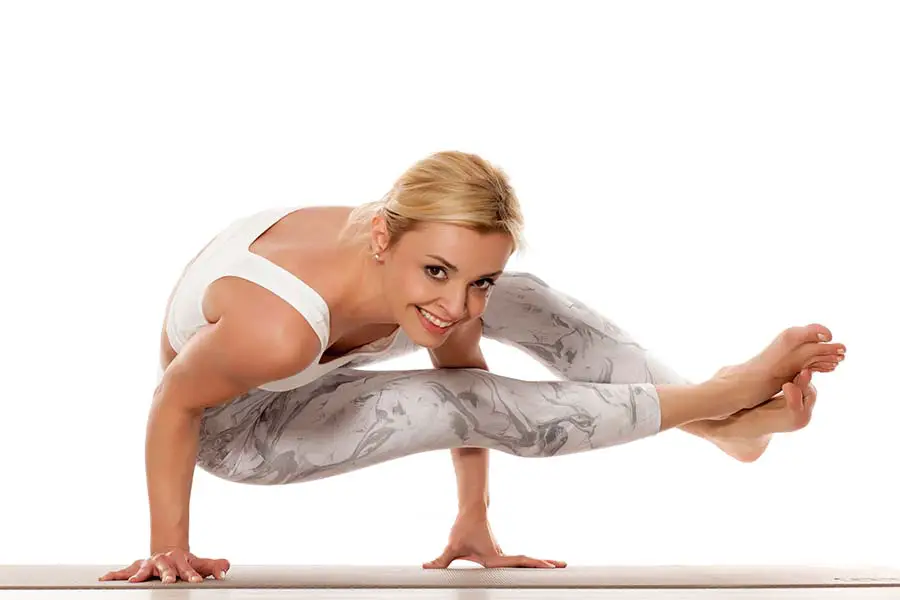
True to its name, when doing this move, you will look like figure 8. And it is a long shot for those with weak arm strength.
The gist of the pose is to bring your arms, abs, back, and leg into unity. And, of course, you also need to be flexible and resilient enough to do it.
- Step 1: Sit in a parallel-legged position, also known as Dandasana. Pull the right knee to your chest, hook it over your upper arm or shoulder with the elbow bent. Keep the left leg extended and place your thighs back on the tricep.
- Step 2: Stretch your shoulder wide apart and rest your palms on the carpet. Pull your shoulders back to lift your body. Hook the left ankle over the right ankle and keep the priesthood.
- Step 3: Take a deep breath in. Gently lift your legs and push yourself up off the mat. Don’t forget to bend the elbows at 90 degrees and do this step slowly.
- Step 4: Squeeze your arms between your thighs. Straighten your body and breathe in and out for 5 to 10 breaths.
Step 5: Relax your body and gently place your butt on the mat. Switch sides and repeat.
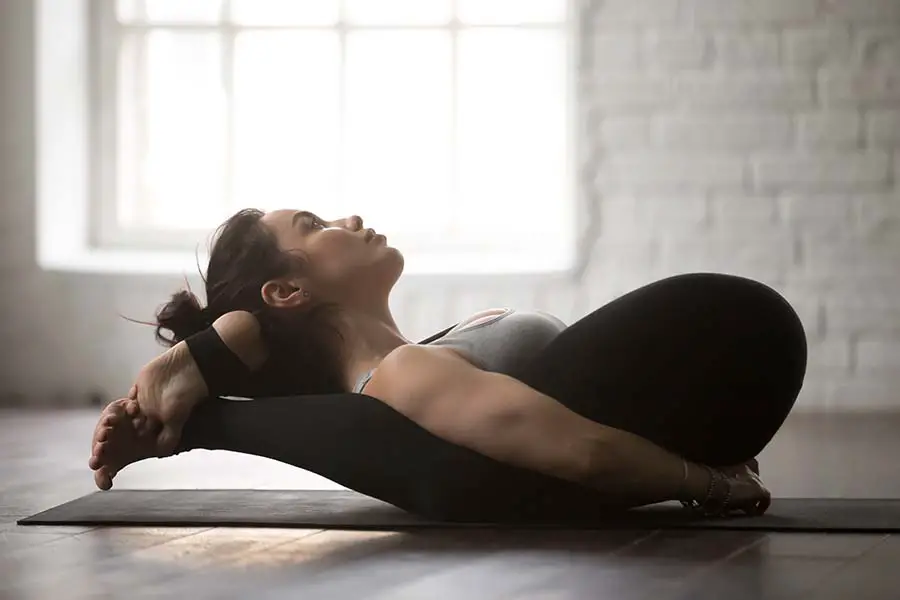
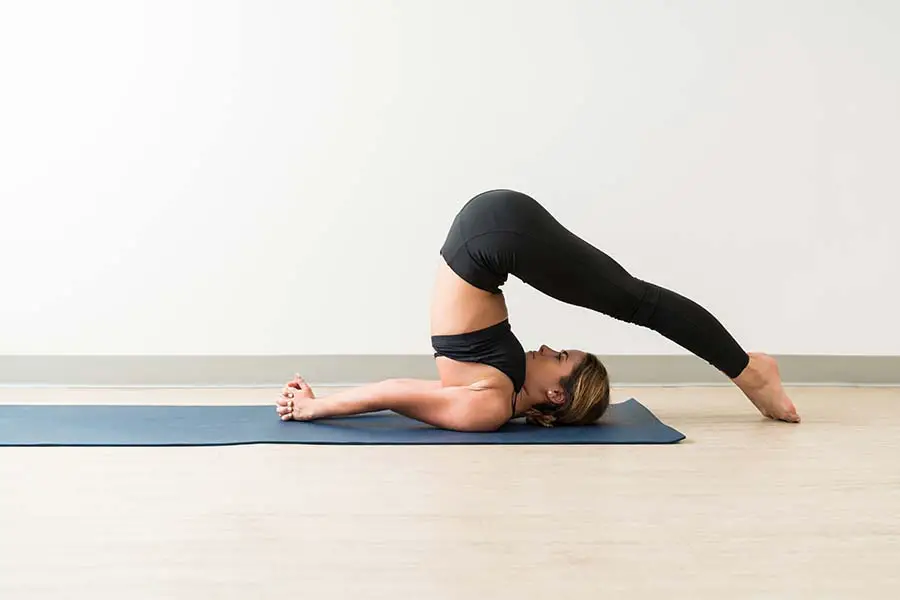
#2. Ear To Knee (Karnapidasana) Pose
You will balance your body with your shoulders and knees with this one. It helps to stretch the back muscles and relax the neck.
- Step 1: Start by lying on your back on the mat and relax your body. Take a deep breath and raise your legs to 90 degrees.
- Step 2: Place your hands behind the waist and gently lift your hips off the mat. Fold the cuffs 90 degrees. Please move gently to avoid injury.
- Step 3: Lower your legs slowly, and it’s right until your toes touch the mat. Note that you still keep your arms straight out on the carpet, behind the vent.
- Step 4: Lower your legs, so your knees are next to your hands. At this point, stretch your back as far as possible and bend your legs. Close your feet to your head and take a deep breath.
- Step 5: Relax and lift your legs. Use your hands to support your back and gently lower your back to the mat.
#3. Iron Cross Headstand (Mukta Hasta Sirsasana C) Pose
This is one of the hardcore and insane yoga poses when you have to use your upper body, specifically your shoulders and head, to support the weight of your entire body.
- Step 1: Start in the table pose. Place both elbows parallel to the mat. Place the pavilion on the ground.
- Step 2: Close your hands next to your head, elbows bent and resting on the ground. Toes gradually step towards the top of the head.
- Step 3: Take a deep breath, combining your shoulders, abs, and thighs to lift your legs off the mat. At this point, your body will form a square crying with the floor, toes pointing up.
- Step 4: Balance slowly, gently lift your arms above your head, stretch them out, and place them, so your palms are facing down on the mat.
- Step 5: Take a deep breath and gently lower your leg. Relax your body in the Baby pose.
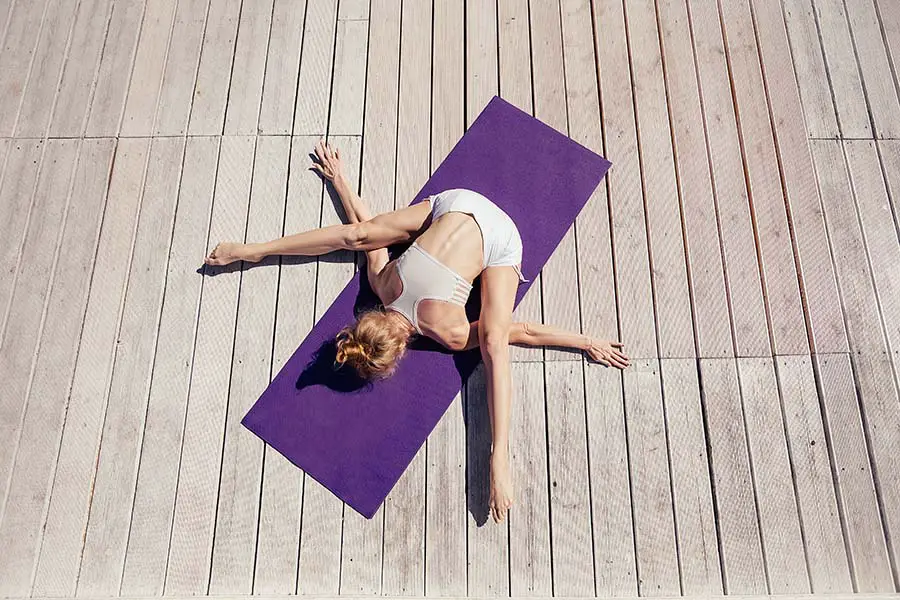
#4. Sleeping Yogi (Yoga Nidrasana) Pose
Sleeping Yogi increases flexibility in the hip and thigh muscles.
- Step 1: Lie on the mat, relax your body, and pull your knees toward your chest. Open your knees to the sides and cross one over one.
- Step 2: Pull your feet towards your forehead and bring your hands under your leg. At this point, your site bone will touch the ground.
- Step 3: Slowly pull your feet behind your head (your head will rest on your feet). Breathe evenly for 5 to 10 breaths.
- Step 4: Finish this pose by relaxing your body, lowering your legs, and placing them on the floor.
#5. Handstand Scorpion (Vrschikasana) Pose
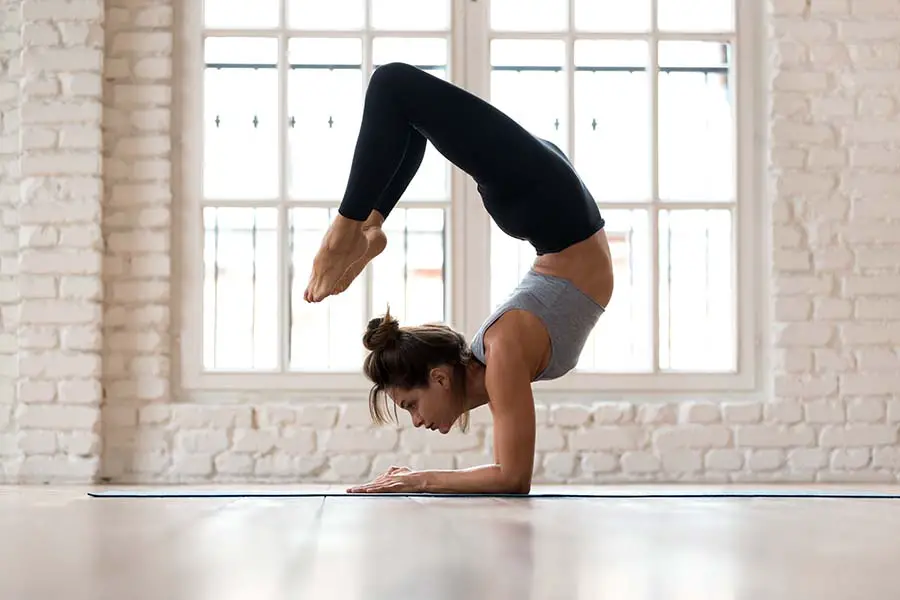
Coming up is a handstand-based pose highlighted with a deep backbend. Stability in the body and flexibility of muscle groups are the recipe for this posture.
- Step 1: Take a downward dog position to start. Pull your shoulders forward, lift your legs off the floor, and straighten them for balance.
- Step 2: Bend your back, eyes looking straight ahead. At this time, the chest will be stretched, and the legs will be extended overhead. Your arms will probably be a little hot and shaky. Let’s do it slowly to balance.
- Step 3: Bend your knees, paying attention to widening your legs to increase balance. Eyes are still forward. Take a deep breath.
- Step 4: Relax, bring your body back to the headstand position. Lower your feet to the mat and exhale.
#6. One-Legged Inverted Staff (Eka Pada Viparita Dandasana) Pose
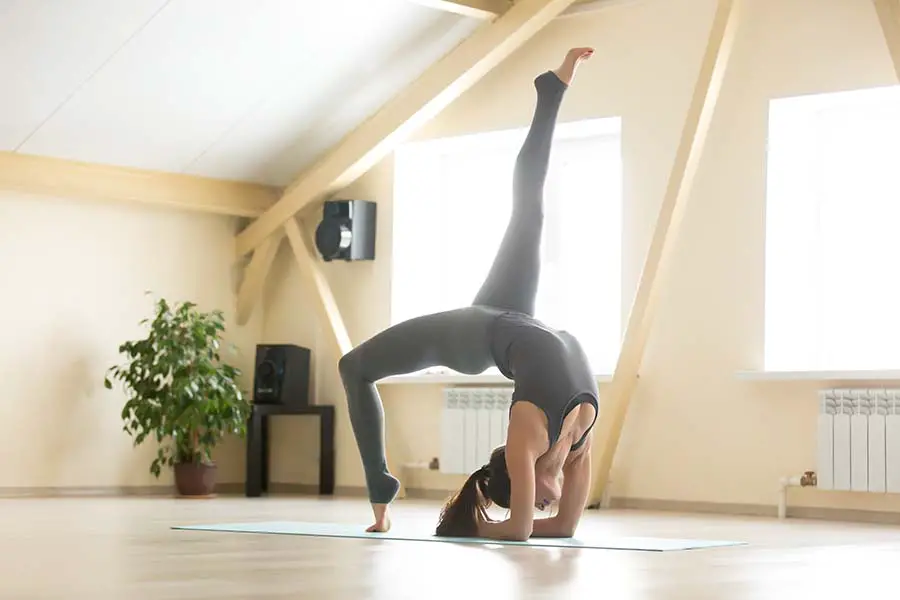
You can try this one to stretch and increase the flexibility of your back and back arm. Front chakras of your body will be opened.
- Step 1: Lie on your back on the mat, bring your feet close to your sitz bone. Your hands now will be up the shoulder.
- Step 2: Place the top of your head on the floor, two elbows perpendicular parallel to the ground. Lift your body to the ground and support it with your toes.
- Step 3: Lift one leg up, toes pointing toward the ceiling at an angle to the ground. Stretch your shoulders, focus your energy, breathe deeply for more balance and comfort, lower one leg and switch the other leg up.
- Step 4: Bend your knees to release. Place your back on the ground and lift your hand off the mat. Stay balanced with your head and gently place your whole body supine.
#7. Peacock (Mayurasana) Pose
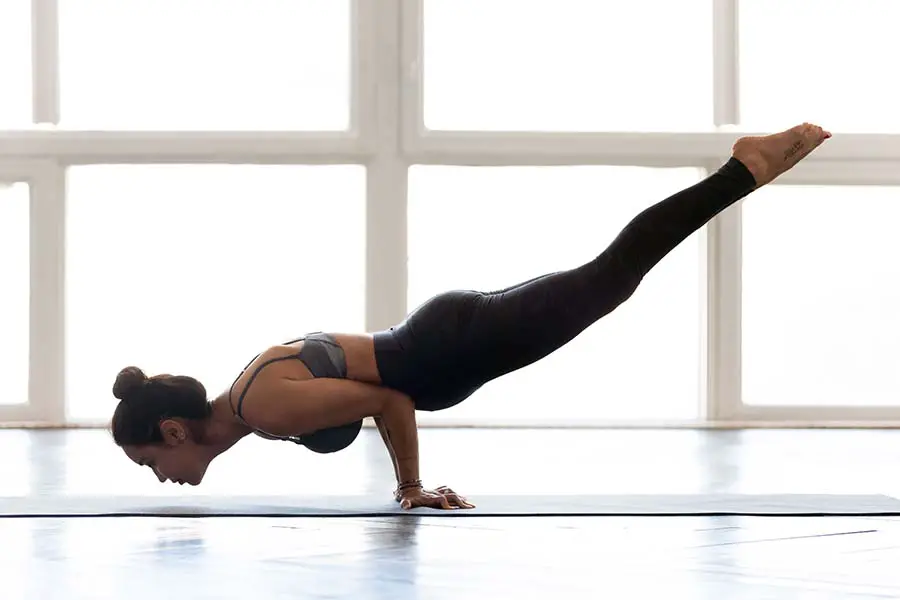
Among these crazy yoga positions, Peacock one calls for your strength in core and glute.
- Step 1: Kneel and place your hands on the mat. Extend your fingers and point your wrists together.
- Step 2: Bodyweight will focus forward. Bend your knees, and make sure heels are almost touching your buttocks. Keep your elbows bent and in line with your navel.
- Step 3: Lift your feet off the floor, still looking ahead. The body will lean to the front, especially the wrists. Hold for at least five seconds and breathe evenly.
- Step 4: Place your feet gently on the ground, lowering your elbows to the floor. Exhale deeply.
View more: 36 Difficult Hard Yoga Poses
#8. Handstand Lotus (Padmasana) Pose
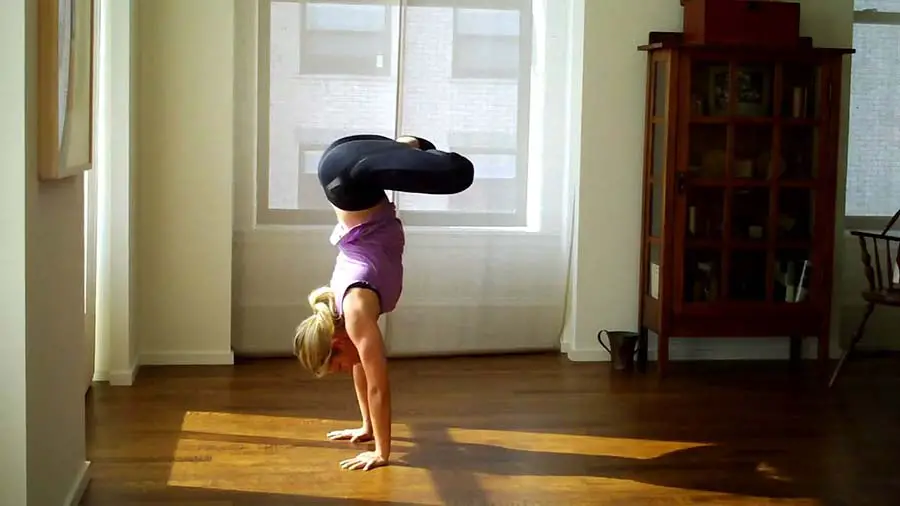
That’s right, and you’ll be holding your body weight entirely with your wrists. This is a position that looks easy but is quite challenging.
- Step 1: You need to do the downward dog pose first. Place your hands on the mat and bear the weight of your shoulders. Slowly bring your legs up in a handstand position.
- Step 2: Cross your legs together to form a lotus pose. The arm will be a little tight and sore. Pay attention to balance to avoid hurting your wrist. Lower your hip and keep this pose in 5 breaths.
- Step 3: It’s time to release. Uncross your legs and back to the handstand pose. Do it slowly as you can hurt your wrist – which has to stand for the large weight. Bend your knees and kneel on the mat in a downward dog pose.
#9. Visvamitrasana Pose
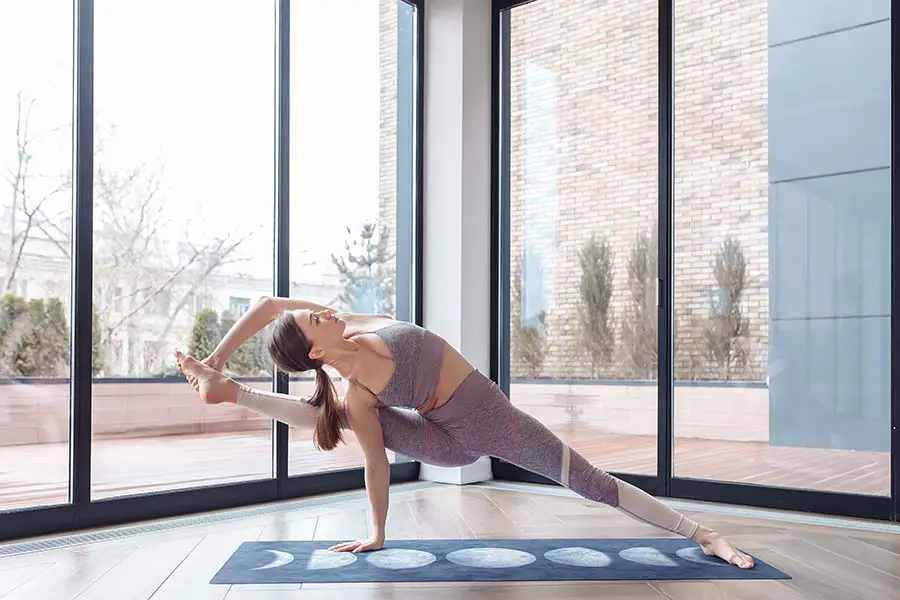
Crazy yoga moves lends you a sense of power, energy, and satisfaction. And this pose is no exception.
- Step 1: It begins with the downward dog pose. Taking a deep breath, lift your right leg with your toes pointing towards the ceiling.
- Step 2: Exhale, pull your right leg to the side. It will look like a lunge with the feet between the hands. At this time, the shoulder will be below the right knee, and the left leg is stretched to the other side.
- Step 3: The left-hand holds the toe of the right foot. The right arm should rest on the mat, bearing the weight of the wrist. Stretch your chest and take a deep breath.
- Step 4: Release the left hand holding the right ankle. Pay attention slowly because your hand is on the ground; carelessness can dislocate your wrist. Return to downward dog and switch to the other side.
#10. Tortoise (Kurmasana) Pose
Hamstrings and hips will be stretched in this operation. It also helps to relax the back, shoulders, and neck.
- Step 1: This pose is started with dandasana. Pull your knees to the sides and extend your feet. Keep them far apart, wider than shoulder-width.
- Step 2: Keep knees extended. Pull your hands to the sides and back. At this point, the elbow will be below the knee. Hands widen, shoulders stretched and forward.
- Step 3: Straighten your legs. It’s advisable to do as much as you can. Lower your body close to the mat; at this point, your shoulders and face will be close to the ground. If you feel your shoulders, arms, and thighs stretching and warming up, you’ve done it right. Inhale and exhale deeply for at least five seconds.
- Step 4: Release your body by pulling your arms away from your feet. Put them in front; gently sit up and close your legs.
#11. Dancer (Natarajasana) Pose
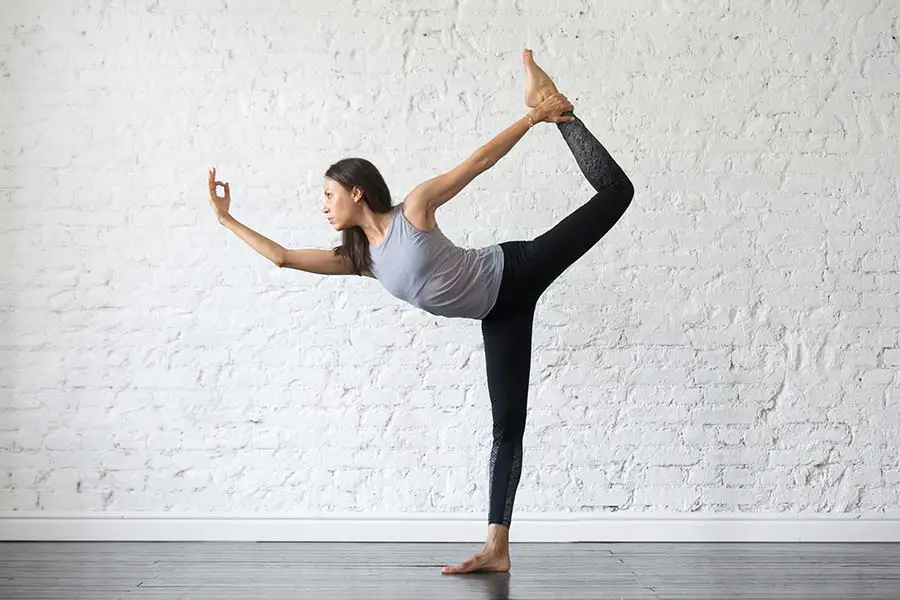
With this pose, you will look like a real ballet dancer. Although it seems simple, it requires a very high level of balance not to fall.
- Step 1: Stand in the tadasana pose. Focus your energy and put your weight on your lower body. At this time, bear the force on the left side and use the left hand to pull the right leg to the side.
- Step 2: Pull the leg from one side gradually to the back. At this point, stretch your chest and bend your knees. Use your hands to pull the right toe as close to the head as possible.
- Step 3: Elbows bent at a 90-degree angle. Shoulder stretch. Take it slow to keep your balance.
- Step 4: Grasp your toes with your hands. The arms will now go around the head. Hold this pose for 5 or 10 seconds. Take a deep breath.
- Step 5: Loosen your arms and let go of your toes; knees bend and slowly lower your feet to the ground. Stand up straight.
#12. Frog (Bhekasana) Pose
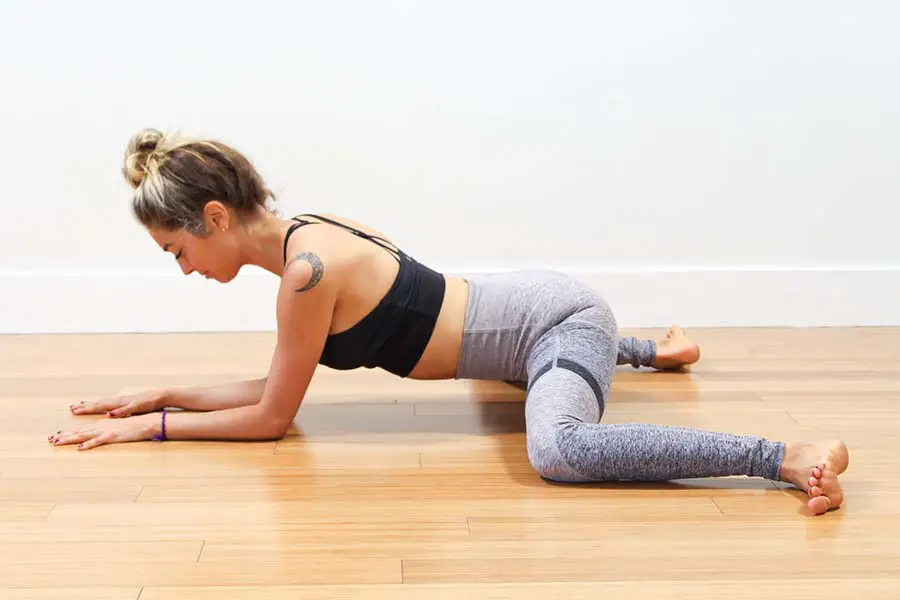
Doing this posture, you open your root chakras, andthe hips, thighs, chest, and shoulders are on their way to reach a new level of flexibility.
- Step 1: Lie on the mat with your head up and your eyes looking forward. Your hands parallel to the mat like a sphinx posture. Make sure your shoulders are in a position where you feel most comfortable.
- Step 2: Bend your knees, bringing your toes up to hip level. Now, the back should be stretched and slightly curved. You will feel heat and pain in your thighs, back muscles, etc.
- Step 3: Stretch your chest, lifting your upper body off the mat. Two hands grasp your toes. Take five to ten deep breaths.
- Step 4: Lower your front body, straighten your back leg, and release your body.
#13. Big Toe Bow (Padangustha Dhanurasana) Pose
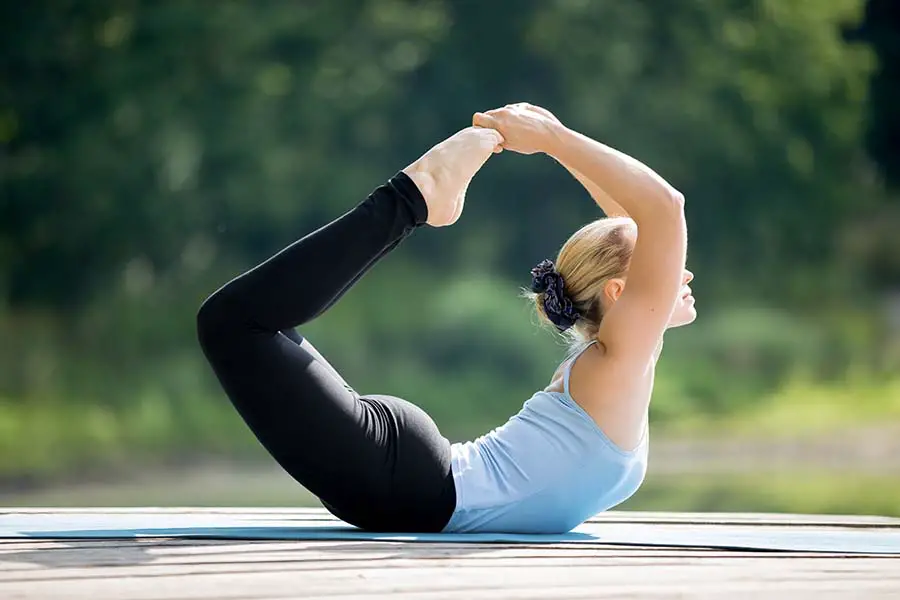
This is one of the crazy yoga poses we like most. At first glance, it will be quite similar to the Frog pose, but it is a bit more difficult. It is preferred to open the root and sacral chakras.
- Step 1: Lie on the mat, gently stretch your upper body forward, elbows resting on the mat. You can see more Sphinx poses if you don’t know how to do it.
- Step 2: Bend your right leg and use your right hand to hold it. Right now, the right hand is over your head.
- Step 3: Continue with the other leg. Use your left hand to pull the boy’s leg up. At this time, the shoulders are tight, the face is forward, and the chest is tight.
- Step 4: Inhale deeply, balancing the body with the abdomen, chest muscles, and pelvis.
- Step 5: Take turns to let go of your hands and feet and place your feet on the floor. Release to Sphinx pose and exhale.
#14. Firefly (Tittibhasana) Pose
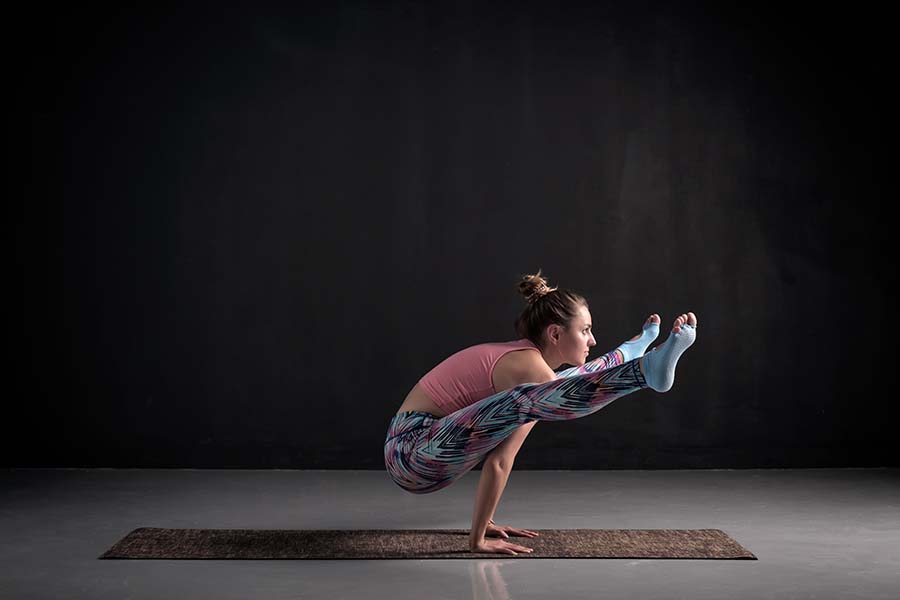
To master this pose, the strength of the arms, legs, and thigh muscles must be at play. It would help if you had a strong arm muscle to do this move.
- Step 1: Stand on the mat, feet wider than hips. Toes pointed outwards, and a 45-degree angle is considered ideal. Then lower your body, and you are in a squat position.
- Step 2: Performing the pose, Anjali mudra is how you will press your palms together. At this point, the elbows are extended simultaneously as the knees are open. Place your hands on the mat to raise your hips. Your right knee should be pressed close to your biceps.
- Step 3: Put your body weight on your hands and arms. Lift each foot off the mat, pulling your feet to the sides and slightly forward. Lower your back and hips, take a deep breath.
- Step 4: Bend your knees and place each foot on the ground. Get down on the mat and release your arms.
See more: 18 Yoga Poses For Two People
#15. Plow (Halasana) Pose
This crazy yoga pose supports your leg and hip to stretch and relax. Simultaneously, it eases your shoulder and back’s pains.
- Step 1: Lie on your back on the mat, legs wide, hands down on the floor. Bend your legs up, pull your feet close to your buttocks so that you feel most comfortable and have support.
- Step 2: Tip your toes and gently lift the hip. You should do each leg in turn for safety and easier balance.
- Step 3: Bring your legs straight up toward the ceiling, making a 90-degree angle with the ground. Or hands clasped together and propped on the floor, placed under the back.
- Step 4: Bring your feet over your head, and lower your legs so that your toes touch the ground. Take a deep breath while you hold this position.
- Step 5: Pull your legs toward the ceiling. Gently lower your legs and support your hips with your hands. Exhale and relax
#16. One-Handed Tree (Eka Hasta Vrksasana) Pose
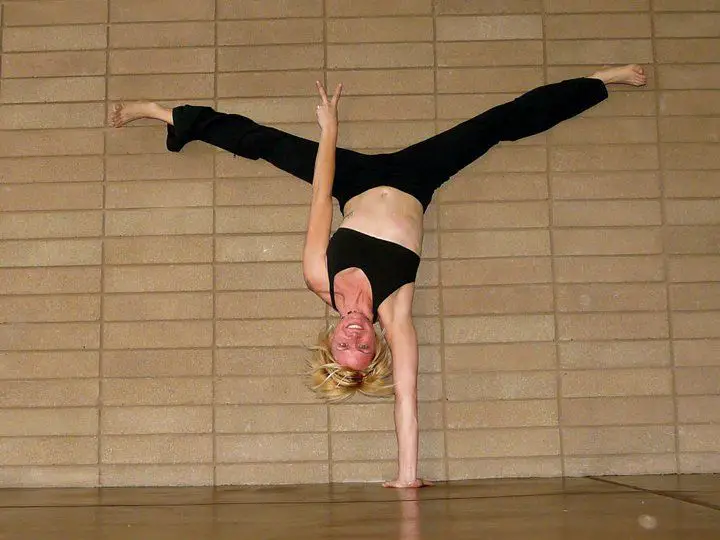
Your arm and abs strength should be your requirements for the One-Handed Tree stance. This pose increases flexibility and lateral strength of the body.
- Step 1: Start with the prone pose first. Bring your arms up in front of you to touch the floor.
- Step 2: Lift your legs up and bring your body back to a handstand. Breathe deeply and hold for about 5 seconds to keep your balance. Slowly move the weight towards the left arm and shoulder, lifting the right hand off the floor.
- Step 3: Pay attention to spreading your legs wide for balance. Hold for 5 seconds then switch sides.
- Step 4: Place both hands on the floor, gently lower your hips, and land with your feet.
See more: See 10 Couples Yoga Poses
Disclaimer
What do you think about these top 16 crazy yoga poses? What are the craziest yoga poses you like most? We make sure all of them are worth trying to challenge yourself and bring you to the next level!
Pay attention to stretching and do it slowly to ensure safety and avoid injury. Concentrating energy and spirit is also very effective for you to conquer these difficult poses.


0 Comments